

Raising poultry successfully begins with proper care, and brooding is one of the most critical stages in this process. From the moment chicks hatch, they rely entirely on their environment for warmth, nourishment, and protection.
In this report, the technical experts of Bounty, a leading poultry integrator in the Philippines, share their practical tips about brooding to establish a strong foundation for a healthy and productive flock.
What is brooding?
Brooding refers to the care and management of newly hatched chicks during their first two weeks of life.
At this stage, chicks are unable to regulate their body temperature and require external heat sources for survival and proper development.
Knowing the importance of brooding in poultry can help farmers prevent common risks associated with this sensitive period.
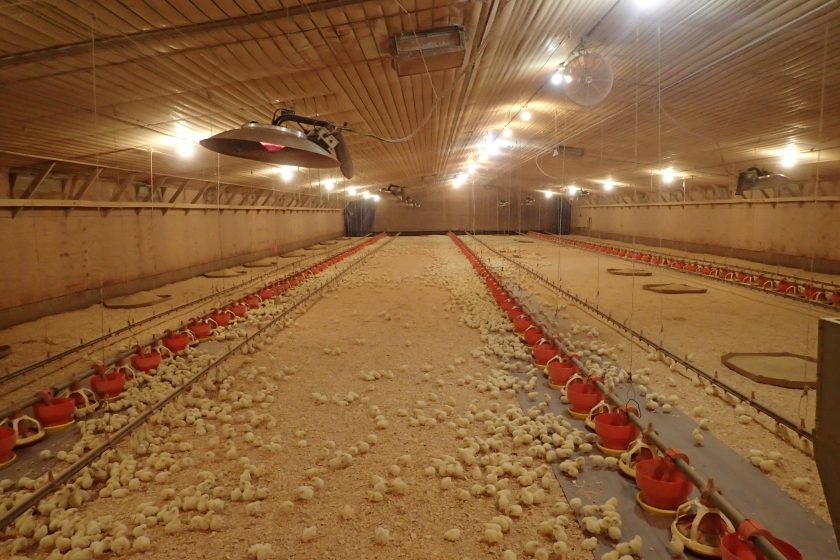
A brooder provides controlled environmental conditions including heat, ventilation, and safety.
Traditional brooders often use infrared heat lamps, while modern poultry farms utilize fully automated systems with temperature sensors, exhaust fans, and space heaters to maintain consistent conditions.
Without adequate brooding, chicks become vulnerable to stress, diseases, and stunted growth, which threatens the future productivity of the flock.
This illustrates once again the importance of brooding in poultry, especially during the early stages of a chick’s life.
Why is brooding important?
Proper brooding directly impacts the poultry’s health, development, and overall performance. When given an optimal environment, chicks grow more efficiently and develop stronger immune systems.
This initial stage of care minimizes early mortality and sets the stage for successful poultry farming, underlining the importance of brooding in poultry operations.
Temperature management is one of the most important aspects of brooding. Newly hatched chicks require a temperature of around 32–35°C (90–95°F) in their first week, gradually decreasing each week as they grow and begin to regulate their body heat.
If temperatures are too low, chicks will huddle together, risking suffocation and uneven growth. If it’s too high, they will become dehydrated and stressed, which might increase mortality, thus reducing their overall productivity.
Beyond temperature, space allocation is another essential factor. Chicks need sufficient room to exhibit their natural behavior and to prevent overcrowding, which can lead to injuries, aggressive behavior, and increased disease risk.
Access to feeders and waterers must also be properly managed to ensure all chicks receive adequate nutrition and hydration, and that they will have uniform growth.
Things to remember about brooding
The key to successful poultry rearing starts with having a systematic and efficient preparation program in place. This must start well before the chicks arrive on the farm.
This involves thorough cleaning and disinfection of the poultry house, equipment, and surrounding areas, along with careful management of temperature and humidity for at least 24 hours before chick placement.
The following checks are required:
- Heater check: Verify that all heaters are installed at the recommended height and are operating at maximum output. This should be checked before preheating the poultry house.
- Temperature sensors check: Sensors should be at bird height and away from any heat source or cooler sections of the house. Ensure that sensors are calibrated before chick placement.
- Floor temperature check: Preheat the house, litter, and air for at least 24 hours before chick placement. Litter temperature should be 30-32°C (86-90°F) with forced air heating. With radiant heaters, the temperature directly under the heat source should be 40.5°C (105°F) and 30-32°C (86-90°F) elsewhere. The concrete floor beneath the litter should be 28-30°C (82.4-86°F). Run minimum ventilation and circulation fans during preheating. Maintain critical floor temperatures for the first two weeks.
- Minimum ventilation check: Activate minimum ventilation when preheating begins to clear waste gases and excess moisture. Seal all air leaks to prevent drafts. Thoroughly ventilate to remove any chemical residues from cleaning and disinfection.
- Drinkers: Provide adequate drinking space, not exceeding 20-25 birds per nipple for partial house brooding. Flush all drinkers to remove sanitizer residue. Ensure water is clean and fresh. Position supplemental drinkers to help chicks find the primary water source. Manually activate nipple drinkers to create a visible water droplet without dripping. Check for and repair any water leaks or airlocks. Set nipple drinkers at the chicks’ eye level.
- Feeders: Place automatic feeding systems on the floor or low in the litter for easy access. Set feeders to an overflow/flood mode for placement. For full house brooding, place 75-100g of feed per chick on high-quality paper next to each drinker line. For partial house brooding, use turbo feeders/trays and paper for the first 7-10 days, with at least one feeder per 75 chicks and paper covering 75% of the floor.
General rules:
- Always keep supplementary feeders filled, refreshing them three times a day. Ensure automatic feeders stay filled for continuous access. Importantly, place all feed and water away from direct heat sources to encourage intake.
- Effective brooding requires attention to detail for the first two weeks of a chick’s life to determine its future.
Here are some essential considerations for successful brooding:
- Temperature control: Start brooder at 95°F (35°C) and reduce by 5°F (3°C) weekly until ambient temperature is reached. Watch for huddling (cold) or panting (hot).
- Space requirements: Provide at least 0.32 sq ft (0.03 m²) per chick during brooding and increase space as they grow to prevent stress and disease.
- Ventilation: Ensure good air quality without creating drafts. Maximum air speed at bird level should be 0.3 m/s (60 ft/min) for days 0-5 and 0.5 m/s (100 ft/min) for days 6-14.
- Lighting: For the first 7 days, provide continuous light at 50-70 lux. During the second week, reduce intensity from 100% down to 30% (around 20-30 lux) by day 14.
- Feeds: Keep feed constantly available and accessible in pans, adjusting levels to minimize spillage.
- Water: Provide fresh, clean water. Set drinker height at eye level for the first 2-3 hours, then just above the head. Ensure a nipple flow rate of 40 mL/min for the first week and flush water lines 2-3 times daily.